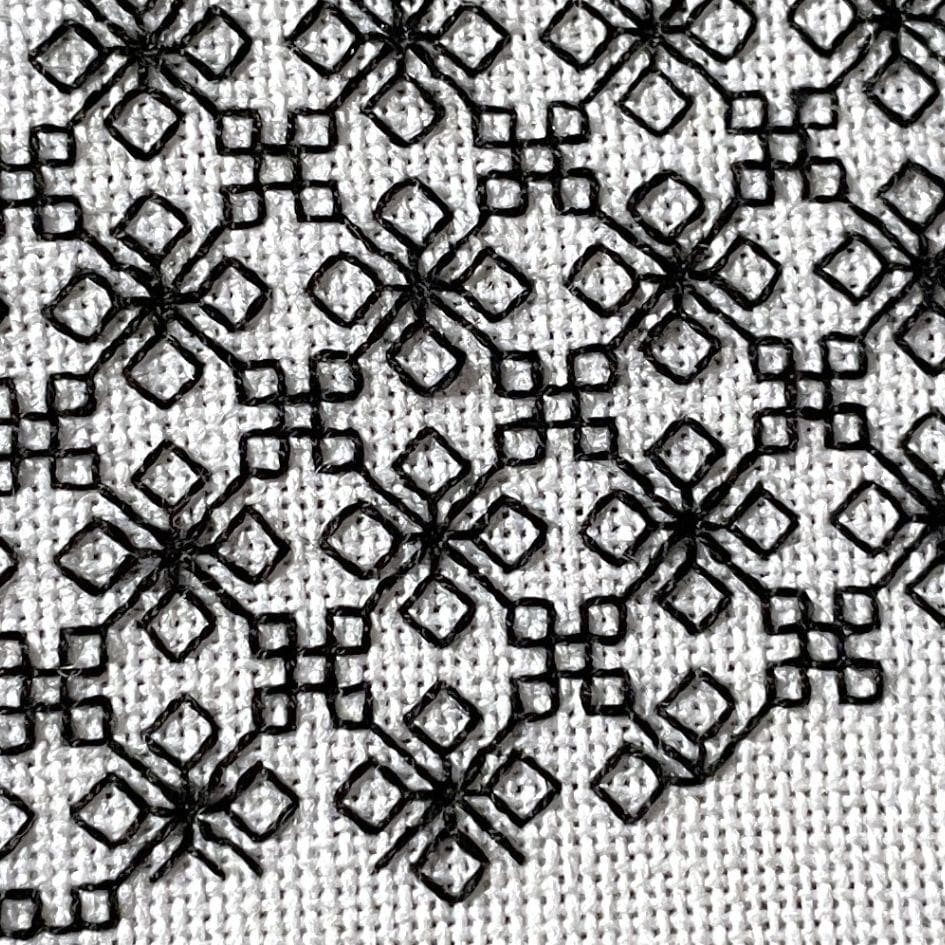
After dreamily reading through lists of many embroidery techniques and researching some of the styles I’ve seen in museums, the first style I’m going to explore more closely is blackwork. The rest of the schedule is not set in stone but I have plenty of ideas to be going on with.
My last blog post has a bit more about my long term plans for a deep dive into embroidery: https://thebritishcrafthouse.co.uk/ginkgo-leaf-embroidery/
Blackwork is an ideal place to start as the techniques involved are very simple. Some of the most commonly used stitches are: back stitch, double running stitch (Holbein stitch), chain stitch and stem stitch. Many blackwork designs can be done entirely in back stitch (hooray, that’s an easy one!).
The reference I’m using for stitches and patterns is Becky Hogg’s excellent book on blackwork, published by the Royal School of Needlework:
https://royal-needlework.org.uk/product/rsn-essential-stitch-guides-blackwork/
The book has an interesting summary of the history of blackwork and its uses. For example the double running stitch – which creates the same design on both sides of the fabric – is also known as Holbein stitch because it appears in so many of Hans Holbein the Younger’s portraits. This in itself indicates what a popular type of decoration it was in the sixteenth century, at least among royalty and the aristocracy who could afford richly embroidered clothes.
Following Becky’s advice in the book, I bought some white 32 count evenweave linen and some tapestry needles. I’m using a size 24 needle and a single strand of DMC black embroidery floss (310).
I’m stitching each design in a 2” x 2” square – large enough to give me an idea of the design but small enough so that I have time to stitch quite a few different styles.
I started by stitching the small diamond pattern in back stitch. One of the pleasing things about blackwork is that even simple designs look striking, so that any design is interesting to stitch.
At first I started by working the whole diamond shape but then realised that I didn’t need to do anything so fiddly. I used a similar technique to cross-stitch, running the stitches diagonally one way and then the other. At the end I followed along the rows adding the tiny notch at the top of each diamond.
After finishing the piece I discovered another method, where the top halves of the diamonds are stitched in staggered rows. The next row down completes the row above, which is also very efficient. This is one of the advantages of blackwork – different methods can produce the same results.
One of the challenges is counting the spaces accurately so that the whole pattern is even. Some designs are simpler than others but the 32 count linen is very finely woven, so I have to keep my wits about me. It’s not compulsory to stitch the design so small – I just love the fiddly delicacy of tiny patterns. I didn’t quite get some of the edges right on the small diamonds, but noticing where I make mistakes is all part of the experience.
Having tackled one fairly basic pattern I was itching to get going on something more demanding. This open lace design is suitably thrilling and beautiful. It is also being worked in back stitch.
Crucially, this design doesn’t allow for a repetitive system of stitching, like the small diamonds. There isn’t a specific way to work the pattern, which means I need to stitch a little more mindfully. The main thing is to keep the stitching within small areas. If the black thread reaches too far across the linen at the back of the design, it will probably be visible on the front. So I need to think about my stitching as I go, to avoid stranding myself in a spot where I need to cross a large gap. If needed I can secure that section and start again somewhere else, but it would be a slow process if I had to do that too often.
This attention to detail can make my eyes (and head) feel tired, but I can also get into a rhythm. Once I had enough of the lace design stitched, it gave me reference points to continue in the same way.
As I have quite a few patterns I want to try out, I’m working on several different pieces now. At the moment I’ve got an enjoyable balance between watching a detailed pattern develop and having a simpler design on hand as well for when my brain wants something easier to follow.
This procession of triangles is done in straight stitch and the design is called triangular darning. It’s one of the patterns which allows for areas to be filled more densely. The combination of darning stitches with more open patterns can be very effective.
Thank you for reading this far – there was quite a lot to talk about. I am planning to stitch a variety of blackwork patterns and create a couple of different sampler displays from them. I will post another update in a month. You can also follow my progress on my YouTube channel:


